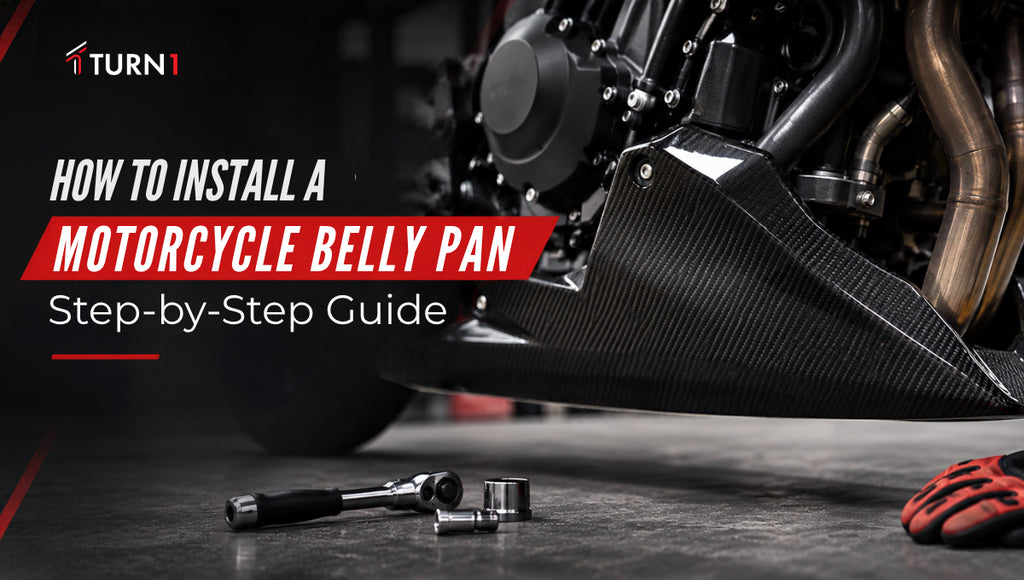
How to Install a Motorcycle Belly Pan: Step-by-Step Guide
How to Install a Motorcycle Belly Pan: Step-by-Step Guide
A motorcycle can look great straight from the factory, but sometimes the exposed space beneath the engine makes the design feel a little unfinished. That's where a belly pan comes in. It covers part of the lower engine area and gives the bike a cleaner, more connected look.
If you've bought a new motorcycle belly pan and are wondering how to fit it, the process is often simpler than it looks. You don't necessarily need a mechanic or a garage full of expensive tools. A few basic tools, the correct mounting kit, and some patience are usually enough for a straightforward installation.
That said, don't expect every bolt to line up perfectly the moment you hold the panel against the motorcycle. You may need to adjust a bracket, reposition a spacer, or loosen a fastener you've already installed. That's a normal part of fitting aftermarket bodywork.
The important thing is to avoid rushing. A belly pan should sit securely without being forced into position, and there must be enough room between the panel and nearby components, particularly the exhaust.
In this guide, we'll go through the installation process step by step. We'll also cover a few things that are easy to overlook when fitting a belly pan for the first time.
Installing the Belly Pan on the Motorcycle
Before getting your tools out, take a look at the underside of your motorcycle.
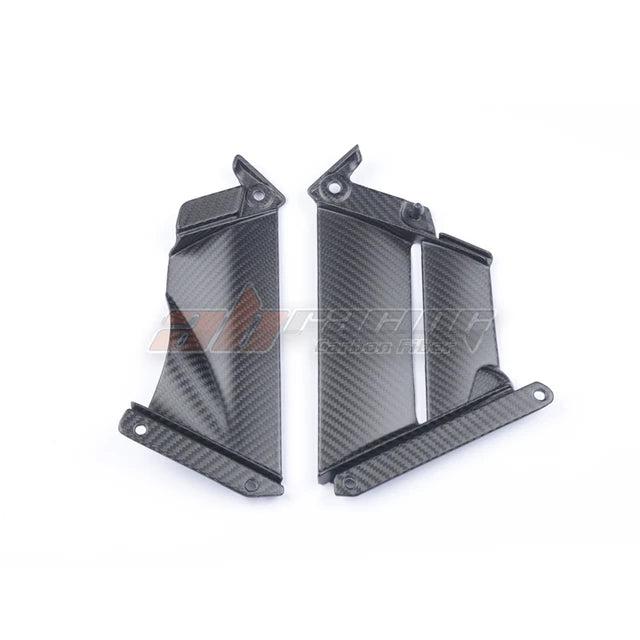
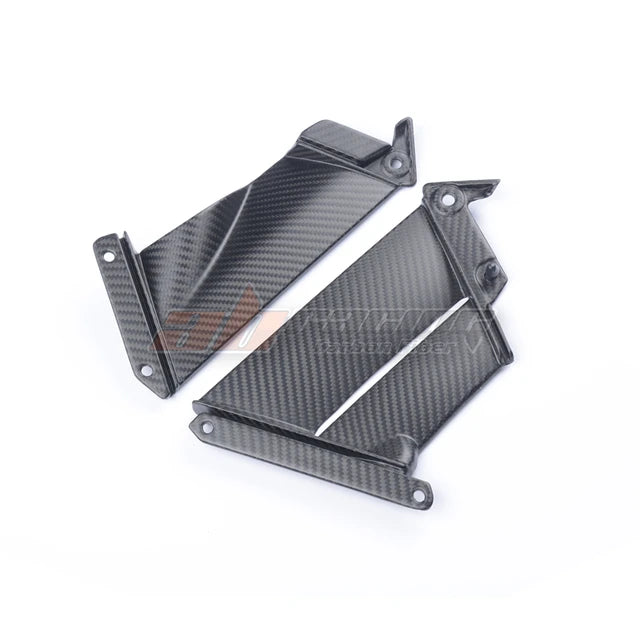
You'll usually find that the belly pan attaches through a set of brackets rather than directly to the engine cover. These brackets hold the panel in position and provide the mounting points for its bolts.
Depending on the kit, you might also have rubber spacers, washers, and a metal crosspiece that connects the brackets.
Lay everything out on a clean surface before starting. It takes less than a minute and saves you from searching for a missing washer halfway through the job.
If your kit comes with instructions, read them first. Even if you've fitted a belly pan before, the mounting arrangement may be different on another motorcycle.
Tools You'll Need
Most belly pan installations don't require specialist equipment. For a typical bracket-mounted kit, you'll want to have:
-
Allen keys or hex wrenches
-
Socket wrench with suitable sockets
-
Screwdrivers, if required
-
Torque wrench
-
Mounting brackets, bolts, and washers
-
Rubber spacers or grommets
-
Clean microfiber cloth
- A suitable motorcycle stand, if needed
You may not use every tool on this list. It depends on the fasteners supplied with your kit and the mounting points on your motorcycle.
Get Your Motorcycle Ready
Park your motorcycle somewhere flat, with enough space to work comfortably on both sides.
Make sure the bike is stable before you begin. If you're using a paddock stand, check that it's properly positioned. And if you've just come back from a ride, give the motorcycle time to cool down. Exhaust pipes can stay hot long after the engine has been switched off.
Now look for the mounting points beneath the engine. On some motorcycles, they're easy to reach. On others, you may need to remove an existing cover or another small panel. Before installing the brackets, hold the belly pan roughly where it will sit. You don't need to bolt anything on yet.
This gives you an idea of how the panel follows the motorcycle's shape and whether anything might get in the way.
Check the exhaust routing, nearby hoses, and other components around the lower engine area.
If the kit requires you to remove an engine-mounting bolt or another structural fastener, don't treat it like an ordinary bodywork bolt. Refer to the motorcycle's service manual for the correct procedure.
Installing a Belly Pan – Now Let's Get Started | How to Do It?
With the motorcycle ready and the mounting hardware laid out, you can start fitting the belly pan.
The steps below cover a common bracket-mounted design. Some kits have a slightly different arrangement, so follow the instructions for your particular motorcycle wherever they differ.
01 – Loosely Secure Brackets
Start with the mounting brackets.
If you've got several brackets that look similar, compare their shapes before attaching them. A small bend or offset can determine which side of the motorcycle each bracket belongs on.
Hold the first bracket against its mounting point and insert the appropriate bolt. Turn the bolt by hand for the first few threads. It should go on smoothly. If it feels tight straight away, back it out and check the alignment.
Once the first bracket is attached, move on to the others.
Here's something worth remembering: don't tighten the brackets completely yet. It might feel natural to secure each bolt as you go, but that can make the next part of the installation harder.
The brackets often need a little movement when you line up the belly pan. Leaving them loose gives you that adjustment.
For now, the bolts only need to hold the brackets in position.
02 – Install Rubber Spacers
Next, find the rubber spacers or grommets that came with the kit. They're easy to overlook because they're small, but they shouldn't be left out.
Depending on the design, these pieces sit between the belly pan and its brackets or fit into the mounting holes.
Their job is to help the panel sit correctly and, in some arrangements, reduce direct contact between the bodywork and metal hardware.
Check where each spacer belongs before fitting it. Some are shaped to sit inside a mounting hole. Others are simple rubber washers that slide over a bolt. Make sure they're seated properly and aren't folded or pinched.
If a spacer doesn't seem to fit, don't trim it or force it into place. Double-check the kit instructions first. This matters even more when installing a carbon fiber belly pan.
Carbon fiber is a rigid material. If the mounting hardware presses unevenly against it, the area around the bolt hole can become stressed.
A correctly positioned spacer helps avoid that problem.
03 – Secure the Right Part of the Belly Pan
Now comes the part where the motorcycle starts to look different. Carefully lift the belly pan into position beneath the engine.
If the kit calls for the right side to be attached first, start there. Otherwise, use the sequence recommended by the manufacturer. You may find it easier to have someone hold the panel while you fit the first couple of bolts. Line up the first mounting hole with its bracket and insert the bolt by hand.
Don't tighten it fully. Just turn it enough to stop the panel from slipping out of position. Move to the next mounting point and do the same.
You might notice that the second or third hole doesn't line up immediately. Before assuming there's a problem with the panel, try adjusting the brackets you left loose earlier.
Sometimes a small change in bracket position is all that's needed. Once the right side is loosely attached, take a look underneath the motorcycle. Check whether the belly pan is touching the exhaust, engine casing, hoses, or other nearby parts.
It shouldn't need to be pushed hard against anything to sit in place.
If you're struggling to align a mounting hole, stop and check the position of the brackets. Tightening a bolt to pull the panel into place can damage the mounting area, especially on carbon fiber components.
04 – Fix the Brackets
With the belly pan hanging loosely from its mounting points, it's time to sort out the alignment. Stand back and look at the motorcycle from the side.
Does the belly pan follow the lower edge of the bike? Is one side sitting noticeably lower than the other? Now look at it from the front. You want the panel to appear balanced, unless its design intentionally has an uneven shape.
If something looks off, adjust the brackets while they're still loose.
This part can take a little trial and error. You might move one bracket slightly, check the panel, and then make another adjustment. There's no benefit in rushing it. Once the belly pan sits where it should, secure the bracket mounting bolts according to the kit instructions.
If a bracket uses an engine or frame mounting point, follow the motorcycle manufacturer's procedure and torque specification.
Don't substitute a generic torque value.
After tightening the brackets, check the panel again. It shouldn't have shifted out of position.
05 – Insert Crosspiece
Some belly pan kits include a metal crosspiece that connects the mounting brackets on opposite sides of the motorcycle.
If yours has one, this is the stage to fit it, provided the kit instructions specify that sequence. The crosspiece helps keep the mounting assembly in its intended position. Find the attachment points and hold the crosspiece between the brackets.
Insert the bolts by hand, leaving them slightly loose until both ends are aligned.
Take a look at where the crosspiece sits. It shouldn't press against the belly pan or interfere with the exhaust, hoses, or other parts beneath the engine. If the holes don't line up, check the bracket positions again. Don't bend the crosspiece or force the bolts through at an angle.
Once everything is correctly positioned, tighten the fasteners to the specified torque.
If your kit doesn't include a crosspiece, there's nothing extra you need to add. Not all belly pans use one.
06 – Tighten All Screws
At this point, the belly pan should be sitting in its final position. Before tightening the remaining bolts, give everything one more look.
Check the panel from both sides and underneath the motorcycle. Make sure the mounting holes are aligned, the spacers are seated properly, and the panel isn't being pulled out of shape. Now tighten the remaining fasteners gradually, following the sequence recommended for your kit.
It's better to work across the mounting points than to tighten one side completely while the other is still loose. Use a torque wrench wherever the manufacturer provides a tightening specification.
If you don't have a verified torque value, check the product documentation or ask the manufacturer rather than guessing.
Be particularly careful around carbon fiber mounting holes. Overtightening can damage the material, even when the bolt feels secure. Once everything is tightened, gently check whether the belly pan moves. There shouldn't be any obvious rattling or looseness.
Finally, inspect the clearance around the exhaust, engine, suspension, hoses, and other nearby components.
If something is touching the belly pan when it shouldn't, fix that before riding.
After your first short ride, let the motorcycle cool and check the fasteners again. It's a simple way to catch any movement that wasn't obvious during installation.
Important Points to Keep in Mind While Installing the Belly Pan on a Motorcycle
The bolts might be tight and the belly pan might look good, but that doesn't automatically mean the job is finished.
There are a few other things worth checking, especially if this is your first time installing aftermarket bodywork.
Make Sure You've Bought the Right Belly Pan
A belly pan that fits one motorcycle won't necessarily fit another, even if the two bikes look similar. Mounting points, exhaust layouts, and engine dimensions can change between models and production years. That's why checking compatibility before buying is important.
Look for the exact motorcycle model and year in the product's fitment information.
If you've changed your exhaust system, check that too. An aftermarket exhaust may take up space that was available with the factory system.
A belly pan designed for your particular motorcycle is generally easier to fit than a universal one.
Don't Force Anything Into Place
One of the easiest mistakes to make is trying to tighten a bolt when the mounting holes don't quite line up. It can be tempting, especially when you're close to finishing.
But if you use the bolt to pull the panel into position, you're putting unnecessary pressure on the mounting area. Instead, loosen the nearby fasteners and adjust the brackets. Check whether a spacer is sitting incorrectly or whether the panel has shifted slightly.
A few minutes spent fixing the alignment is better than damaging a new belly pan.
Pay Attention to Exhaust Clearance
The exhaust is one area you really don't want to overlook. Exhaust headers and catalytic converters can get extremely hot, and a belly pan fitted too close to them may suffer heat damage.
Check the space around the exhaust before tightening everything.
Don't judge clearance only from one side of the motorcycle. Look underneath and inspect any areas where the exhaust passes close to the panel. If your belly pan requires a heat shield, use the protection recommended for that specific application.
And if you're unsure whether the clearance is safe, have a qualified motorcycle technician check it before riding.
Be Careful With Carbon Fiber
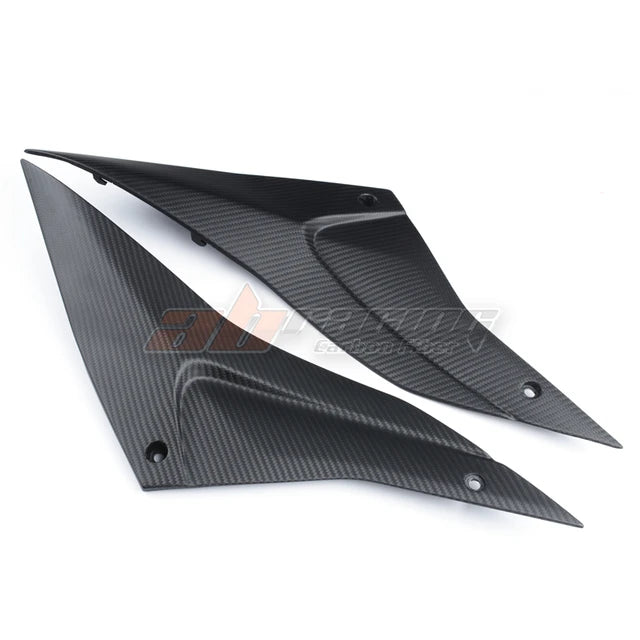
A carbon fiber belly pan can make a noticeable difference to the motorcycle's appearance, particularly when paired with other carbon fiber components.
But it's worth treating the panel carefully while installing it. Put it on a clean cloth rather than directly on the garage floor. Keep tools away from the finished surface, and check the mounting holes before inserting the bolts.
Carbon fiber is strong and lightweight, but that doesn't mean it can be forced into position without consequences. If a bracket is misaligned, adjust the bracket. Don't bend the panel to make it fit.
Also, avoid overtightening the mounting hardware. Too much pressure around a bolt hole can damage the material.
If you spot a crack or damaged mounting point, stop the installation and contact the supplier.
Check How the Belly Pan Looks From Both Sides
It's easy to spend so much time looking at the mounting bolts that you forget to check the overall appearance.
Once the panel is loosely fitted, step away from the motorcycle. Look at it from the front, then from both sides.
Does the belly pan follow the lines of the motorcycle? Are the gaps between the panel and surrounding bodywork reasonably even?
If the design uses two separate sections, check how they meet underneath the engine. Small changes to the bracket positions can improve the final fit.
This is one of those jobs where taking your time usually pays off.
Think About Future Maintenance
Before finishing, check whether the belly pan blocks access to anything you'll need later.
For example, can you still reach the oil drain plug? Does the panel cover a service point that you'll need during an oil change?
Some belly pans have openings for maintenance, while others need to be removed when the motorcycle is serviced. Neither arrangement is necessarily a problem, but it's useful to know beforehand.
Also, make sure any required drainage or ventilation openings remain clear.
If you're fitting the belly pan to a track motorcycle, check the event's technical requirements. Some racing organizations require lower fairings that can retain engine fluids.
A regular street belly pan may not meet those rules.
Check the Hardware After Riding
Even when the installation feels secure, it's sensible to inspect it again after the first ride.
Take the motorcycle out for a short, gentle ride once you've confirmed that all the mounting points and clearances are correct. Listen for unusual rattling or vibration.
When you return, allow the engine and exhaust to cool before checking the bolts and brackets. Look for any signs of rubbing, movement, or heat damage. If everything is still sitting properly, that's a good sign.
You should also include the belly pan in your regular motorcycle inspections, especially if you often ride on rough roads.
Final Thoughts
Installing a motorcycle belly pan is a manageable job for many riders, but getting the details right matters.
The brackets should sit properly, the spacers need to be in the right places, and the panel shouldn't be forced against its mounting points.
Take your time with the alignment before tightening the bolts. It's much easier to make small adjustments while everything is still loose.
Once the belly pan is fitted, check the exhaust clearance and make sure nothing underneath the motorcycle is rubbing against it.
And don't forget to inspect the hardware after your first ride.
A well-fitted belly pan should look like it belongs on the motorcycle, not like something that's been squeezed into place.
If you're considering a carbon fiber upgrade, explore Turn1's motorcycle carbon fiber parts to find components for your ride.
Frequently Asked Questions
1. What is the purpose of a belly pan on a motorcycle?
The main motorcycle belly pan’s purpose is to cover part of the exposed lower engine area and give the bike a more finished appearance. Depending on the design, it may also help shield certain components from road spray and small debris. Some belly pans are shaped with airflow in mind, although the aerodynamic benefit depends on the motorcycle and the panel itself. For most street riders, the main attraction is the way a belly pan changes the bike's appearance.
2. Is a Carbon Fiber Belly Pan Worth Installing on the Motorcycle?
A carbon fiber belly pan can be worth installing if you like the look of carbon fiber and want a lightweight aftermarket component. The woven finish works particularly well on sport motorcycles and can complement other carbon fiber parts. However, don't expect a belly pan alone to make a noticeable difference to your motorcycle's performance. The actual weight savings depend on the part being replaced. Fitment, material quality, and proper installation should come before appearance.
3. Is a Belly Pan Necessary on the Motorcycle?
Not always. Many naked motorcycles and street bikes are designed without a belly pan, so adding one is usually a matter of personal preference. However, if your motorcycle came with a factory-fitted lower fairing, it may serve a specific purpose related to airflow, shielding, or component mounting. In that case, check the manufacturer's guidance before removing it. Certain racing events may also require a belly pan that meets their technical regulations.
4. Can You Drive a Motorcycle Without a Belly Pan?
Yes, provided your motorcycle was designed to operate without one. Many naked bikes have exposed lower engine areas from the factory and can be ridden normally without a belly pan. However, if your motorcycle originally had one, it's worth checking why it was fitted before removing it. If you're taking off a damaged belly pan, make sure there are no loose brackets, bolts, or other components left behind.
RECENT POSTS

21.August.2026
Carbon Fiber Degradation: How to Stop Carbon Fiber from Degrading Over Time?
0 Comments

07.August.2026
Does Carbon Fiber Have a Fatigue Life? Understanding Its Strengths and Limitations
0 Comments